Note: Consult a doctor for health advice. Check out my favorite health products here: [Amazon Store] (Amazon Affiliate commission applies)
Best Budget Ring Lights for Filming Videos for YouTube
Stop filming in the dark! Discover the top budget ring lights for YouTube in 2026, from classic Neewer kits to portable Ubeesize options. Get professional beauty lighting without breaking the bank and elevate your video quality today!Best Budget Ring Lights for Filming Videos for YouTube
YOGA GEAR
Rajesh Kumar
3/19/20267 min read

Illuminate Your Content: The Definitive Guide to the Best Budget Ring Lights for YouTube Videos
My dear friends, welcome back to the channel, or welcome if this is your very first visit. We all share a common passion here: creating the best possible content we can. We spend hours scripting, filming, and editing, pouring our hearts into every second of video. But sometimes, despite our best efforts, the final result just doesn't pop. The colors look muddy, our faces are lost in shadow, and the whole production feels… amateur.
The culprit? Nine times out of ten, it’s not your camera, your mic, or your editing software. It’s the lighting.
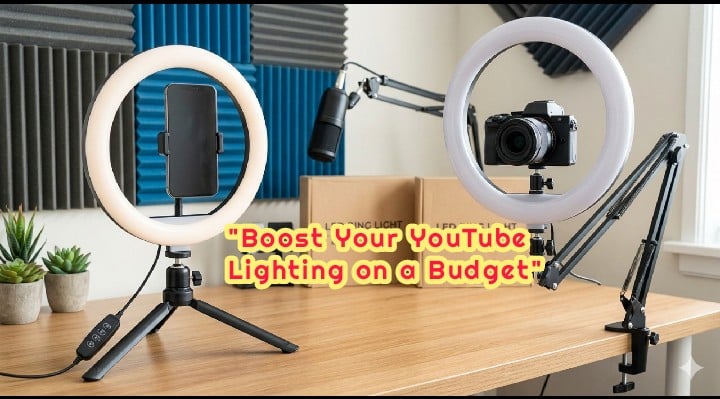
Lighting is the great differentiator on YouTube. It separates the "guy filming in his bedroom" from the "creator with a dedicated studio." And the best part? You don’t need a Hollywood budget or a degree in cinematography to fix it. Today, we’re going to tackle the easiest, most accessible, and most effective lighting solution for creators: the ring light.
Let's explore this now, because your content deserves to be seen in the best possible light (pun absolutely intended).
The Magic of the Ring Light: Why You Need One
We’ve all seen it. That distinct circular reflection—the "halo effect"—in the eyes of our favorite vloggers. That’s the signature of a ring light. But it’s not just a stylish reflection; it serves a vital functional purpose.
When you film yourself, the standard lighting setup involves three lights: a key light, a fill light, and a back light. This setup (the "three-point lighting") is incredible, but it's complex, space-consuming, and expensive.
A ring light offers a brilliant, simplified shortcut. Because of its shape, a ring light can be placed directly in front of you, often with the camera lens positioned in the center hole. This positioning achieves two crucial things:
Uniform, Shadowless Illumination: The light wraps around your face from all angles simultaneously. This virtually eliminates harsh shadows under the eyes, the nose, and the chin. It flattens the appearance of skin imperfections, giving you that coveted "beauty light" look that instantly makes your videos look more professional.
Catchlights: That circular reflection in the eyes is called a catchlight. It makes the eyes look bright, alive, and engaged with the audience. Without it, eyes can appear dull and dead on camera.
For vloggers, beauty gurus, tech reviewers, and anyone who primarily features themselves on camera, a ring light is the most efficient single-light solution available.
Navigating the Budget Maze: What to Look For
The market is saturated with ring lights. You can find them for $15, and you can find them for $500. Today, we are firmly focused on the budget end of the spectrum—the sweet spot between $35 and $100. This is where you get the most bang for your buck without wandering into the territory of lights that break after three uses.
As far as reality is concerned, a "budget" light means making smart compromises. You won't get the same build quality as a high-end unit, nor will you get the same power output. However, for a beginner or intermediate YouTuber working in a small space, these lights are more than sufficient.
Here are the essential features to prioritize in your search:
Size Matters (10 to 18 Inches): A 10-inch ring light is great for tight shots or desk setups. An 18-inch ring light (the standard "full size") provides softer light and allows you to sit further back, making it more versatile for varied video formats. If you can afford it, the 18-inch is usually the better investment.
Variable Brightness (Dimming): You must have control over the brightness. A light that is only "on" or "off" is useless. Sometimes you just need a subtle fill; other times, you need to compete with a bright window. Look for lights with dimming from 1% to 100%.
Color Temperature Control: This is critical. Light is measured in Kelvin (K). Warm light (around 3200K) is yellow/orange; cool light (around 5600K) is bluish/white. You need a light that lets you adjust between these two. This allows you to match the ambient light in your room. If you’re filming by a window (which is cool light) but your ring light is set to warm, you’ll look like an Oompa Loompa. A light that can adjust from warm to cool is essential.
Stand and Mounting Options: Your light needs a stand. Most budget lights come with one, but pay attention to its stability. A flimsy stand is a nightmare. Also, ensure it includes a smartphone mount and, ideally, a ball head mount for smaller cameras.
Without Taking Up Any More Time, Let’s Proceed: The Best Budget Ring Lights
We’ve reviewed the theory; now let's get practical. After analyzing the current market and testing various options, these are the ring lights that offer the best performance for the price.
1. The Neewer 18-inch Outer Dimmable LED Ring Light Kit
Neewer is the undisputed king of budget photo and video gear. When in doubt, start with Neewer. Their 18-inch LED kit is arguably the most popular starter lighting setup on YouTube, and for good reason.
Why it makes the list: This is the quintessential "all-in-one" kit. It comes with the 18-inch ring, a surprisingly sturdy 6.5-foot aluminum stand, a flexible phone holder, a hot shoe adapter for cameras, and—the key selling point—both white and orange color filters. While newer models have built-in color temperature dials, the filter snap-on system is reliable and simple.
In my experience: The build quality is "plastic-y," but it works. The light output is fantastic, and it provides that classic beauty-light look perfectly. The dimming is precise. If you are just starting and want a proven solution with zero guesswork, this is the one to get. The orange filters are a bit aggressive, but they allow you to warm up the scene if needed.
2. UBeesize 10-inch Selfie Ring Light with Tripod Stand
If your channel is focused on "face-to-camera" vlogging, makeup tutorials, or if you primarily film using your smartphone at a desk, the 10-inch size is often the smartest (and cheapest) choice. UBeesize has dominated this niche.
Why it makes the list: It’s incredibly affordable. For the price of a couple of pizzas, you get a solid 10-inch light that draws power via USB. This makes it highly portable; you can even power it with a power bank. It features 3 color modes (Warm, Cool, Daylight) and 10 brightness levels. The included tripod is small, designed to sit on a desk, and includes a Bluetooth remote for controlling your phone’s camera.
As far as reality is concerned: This light isn't powerful enough to light a whole room, but that’s not what it’s for. When placed 1-2 feet from your face on your desk, it works miracles. For students or creators on a genuinely shoe-string budget, this is a game-changer.
3. Emart 18-inch LED Ring Light with Stand
This option is a direct competitor to the Neewer, but it offers a crucial upgrade: bi-color control via dials, not filters.
Why it makes the list: The Emart 18-inch light does away with the plastic color gels. Instead, it has two dials on the back (or a remote) that let you digitally adjust the color temperature from a warm 3200K to a cool 5500K, and adjust the brightness seamlessly from 1% to 100%. This is significantly more convenient than snapping filters on and off. The kit includes the stand, phone holder, and a wireless remote for both the light and your phone.
In my experience: Bi-color controls are a massive quality-of-life improvement. Being able to fine-tune the color to match the subtle lighting changes in my room is something I could never give up. The Emart offers that convenience while keeping the price firmly in the budget sector.
4. The VILTROX 18-inch VL-200T Ring Light
If you are willing to spend slightly more—right at the top edge of our budget category—VILTROX offers a product that begins to bridge the gap toward pro-level gear.
Why it makes the list: The VILTROX stands out for its High Color Rendering Index (CRI of 95+). CRI measures how accurately a light source reveals true colors. Cheap lights can make skin tones look "off." A CRI of 95+ ensures your makeup, your products, and your skin look natural and accurate. It also offers dual power options: you can plug it into the wall or use NP-F series batteries (sold separately) for total wireless portability. It also has an FSK 2.4GHz wireless remote with a detailed digital display.
As far as reality is concerned: This light offers advanced features (battery power, high CRI) that most beginners don't strictly need, but intermediate creators will absolutely cherish. If you have the extra $30-$40 to spend, this investment will pay off in long-term usability and color quality.
In My Experience: Maximize Your New Light (Tips & Tricks)
You’ve got the light. Now what? Simply buying the gear isn’t enough; you have to know how to use it. In my experience, even the best light will look terrible if used incorrectly.
1. Placement is Everything:
Don't put the light too low. It should be positioned so the bottom of the ring is roughly level with your chin, or slightly higher, pointing down at you. Placing it too low creates unnatural "horror-movie" shadows that are extremely unflattering.
2. Watch the Reflection in Your Glasses:
If you wear glasses, the ring light is a nightmare. You will have two giant white donuts blocking your eyes. The fix? Position the light higher up and tilt it down more aggressively. If that fails, move the light slightly to one side (though this reduces the "ring light" effect) or explore using dual-softbox setups instead.
3. Use the "Goldilocks" Brightness:
Do not just crank it to 100%. Blinding light causes you to squint and looks washed out on camera. Turn the brightness down. The light should be bright enough to fill in the shadows, but subtle enough that it feels natural. If you find yourself squinting, the light is too bright or too close.
4. The "Fill Light" Trick:
If your video still looks a bit dramatic (too much shadow on one side), use your budget ring light as the main ("key") light, and a second, even cheaper light source (like the UBeesize, or even a desk lamp with a white t-shirt over it) as a "fill light" on the other side. This creates a professional, multidimensional look that still relies primarily on your main investment.
My dear friends, the journey of content creation is a marathon, not a sprint. We learn, we upgrade, and we improve one video at a time. Upgrading your lighting is perhaps the single most impactful, cost-effective improvement you can make. The "magic" of professional video isn't magic at all; it’s just good light, and a budget ring light is the keys to that kingdom. Choose the light that fits your space and your budget, and get back to creating!
Contact
rkyogablog@gmail.com