Note: Consult a doctor for health advice. Check out my favorite health products here: [Amazon Store] (Amazon Affiliate commission applies)
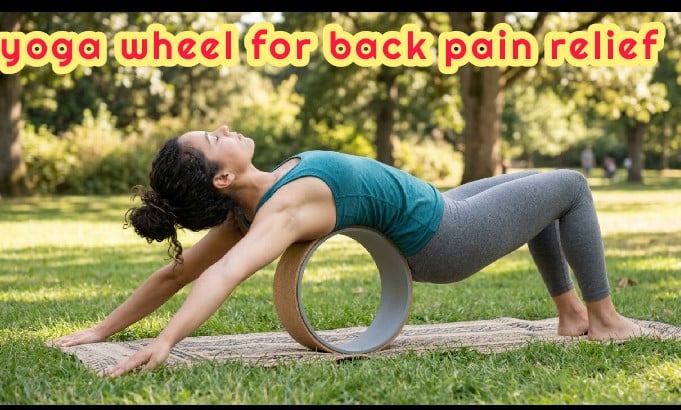
How to Use a Yoga Wheel for Back Pain Relief
Discover how to effectively use a yoga wheel for back pain relief. Explore 5 simple and natural stretches designed to decompress your spine, release tension, and improve your posture for better overall well-being.How to Use a Yoga Wheel for Back Pain Relief
YOGA GEAR
Rajesh Kumar
3/12/20266 min read
My How to Use a Yoga Wheel for Back Pain Relief: A Comprehensive Guide
My dear friends, welcome. If you are reading this, chances are you or someone you care about is intimately familiar with the persistent, nagging ache of back pain. In our modern world, where so much of our time is spent hunched over desks, steering wheels, and screens, spinal discomfort has become an almost universal experience. However, the path to healing doesn’t always require complicated interventions. Often, the most effective relief comes from returning to the foundational principles of holistic health, mindful movement, and targeted stretching.
Today, we are going to dive deeply into one of the most effective, yet beautifully simple, props available to us today: the yoga wheel. Whether you are deeply rooted in traditional naturopathy or just beginning to explore mindful movement, this circular tool can dramatically transform how you care for your spine.
As far as reality is concerned, the yoga wheel might look like nothing more than a simple plastic or wooden circle covered in foam, but it is actually a highly engineered tool designed specifically to mirror the natural curvature of your spine. It assists in opening the chest, stretching the abdominal muscles, and, most importantly, safely guiding the back into extensions that reverse the damage of our daily, forward-leaning postures.
Why exactly does this hollow cylinder work so well for our bodies? Let's explore this now, looking closely at the mechanics of back pain and how this tool provides natural, sustainable relief.
Understanding the Mechanics of Back Pain
Before we jump into the physical practice, it is vital to understand what we are trying to remedy. The human spine is a marvel of biological engineering, designed to move fluidly in multiple directions: flexion (bending forward), extension (bending backward), lateral flexion (bending side to side), and rotation (twisting).
Unfortunately, our modern lifestyles trap us in a state of chronic flexion. We sit looking at phones, typing on laptops, and slouching on couches. This constant forward fold tightens the muscles in the chest and the front of the shoulders, while simultaneously overstretching and weakening the muscles of the upper and lower back. Over time, this imbalance pulls the spine out of its natural, healthy alignment, leading to tension, compression, and pain.
The yoga wheel serves as the perfect antidote to chronic flexion. By laying back over the wheel, we safely introduce the spine to extension. This action decompresses the vertebrae, gently stretches the tight muscles of the anterior chain (the front of the body), and allows the overworked muscles of the posterior chain (the back of the body) to finally relax and release their tension.
Without taking up any more time, let's proceed to the practical applications. Here is a comprehensive, step-by-step guide to using a yoga wheel to melt away back pain.
5 Transformative Yoga Wheel Poses for Back Pain Relief
For these exercises, find a quiet space, lay down a comfortable yoga mat, and keep your yoga wheel nearby. Remember to breathe deeply and smoothly throughout each movement, allowing your breath to guide the release of tension.
(Blogger's Note: This is an excellent place to insert an Amazon Influencer link to your favorite yoga wheels so your readers can find exactly what you recommend!)
1. The Full Spinal Massage (Dynamic Rolling)
This is often the first thing people want to do when they get a yoga wheel, and for good reason. It mimics the effects of a deep tissue massage along the erector spinae muscles that run parallel to your spine.
How to do it: Sit on your mat with your knees bent and feet flat on the floor, hip-width apart. Place the yoga wheel directly behind you, resting against the base of your spine (your sacrum).
The Movement: Lean back against the wheel. Gently press into your feet and lift your hips off the floor. Slowly begin to roll backward, allowing the wheel to move up your spine toward your shoulder blades.
The Breath: Inhale as you roll back and open your chest; exhale as you roll forward toward the starting position.
The Benefit: This dynamic movement irons out knots, increases blood flow to the spinal tissues, and provides an immediate sense of relief for stiff, aching backs.
2. Supported Fish Pose (Matsyasana)
If you carry tension between your shoulder blades or suffer from "text neck," this static hold is incredibly restorative. It passively opens the heart center and reverses upper back slouching.
How to do it: Begin exactly as you did for the spinal massage, sitting with the wheel at the base of your spine.
The Movement: Lean back over the wheel, allowing it to support the curve of your mid and upper back. Rest your head either gently on the wheel (if it reaches) or let it hang back safely. Drop your arms to your sides, palms facing up, and let your shoulders melt down toward the floor. Straighten your legs out in front of you.
The Breath: Stay here for 1 to 3 minutes, taking deep, expansive breaths into your ribcage.
The Benefit: This pose deeply stretches the pectoral muscles and the front of the neck, releasing the physical tension that pulls the upper spine out of alignment.
3. Extended Child’s Pose (Balasana with a Wheel)
Lower back pain is frequently caused by tight latissimus dorsi (the large muscles of the back) and tight shoulders. Using the wheel in Child's Pose provides a deeper traction for the lumbar spine.
How to do it: Kneel on your mat, bringing your big toes together and spreading your knees slightly wider than your hips. Place the yoga wheel on the floor directly in front of you.
The Movement: Place both hands on top of the wheel. As you exhale, slowly roll the wheel forward, extending your arms fully while sinking your hips back toward your heels. Let your chest and forehead melt toward the mat.
The Breath: Hold for 5 to 10 deep breaths, focusing on lengthening the space between your tailbone and your fingertips.
The Benefit: This gently decompresses the lower spine while providing a beautiful, elongating stretch through the shoulders and side body.
4. Supported Bridge Pose (Setu Bandhasana)
This pose is phenomenal for the lower back and sacroiliac (SI) joint, providing sturdy support while safely elevating the pelvis.
How to do it: Lie flat on your back with your knees bent and feet on the mat. Lift your hips up into a standard bridge pose.
The Movement: Slide the yoga wheel underneath your hips, resting your sacrum (the flat, triangular bone at the base of your spine) directly on top of the wheel. Ensure the wheel is under your pelvis, not your fragile lower lumbar vertebrae. You can keep your knees bent, or for a deeper stretch in the hip flexors, slowly extend your legs out straight.
The Breath: Relax your arms by your sides and hold for 2 to 3 minutes, breathing softly into your belly.
The Benefit: By elevating the hips and stretching the hip flexors (psoas), which are directly connected to the lumbar spine, you relieve the pulling sensation that often causes lower back pain.
5. Seated Forward Fold (Paschimottanasana)
It might seem counterintuitive to fold forward when treating back pain, but tight hamstrings pull directly on the pelvis, which in turn strains the lower back. The wheel can help deepen a hamstring stretch safely.
How to do it: Sit up tall with your legs extended straight in front of you. Place the yoga wheel near your calves or ankles.
The Movement: Inhale to lengthen your spine, reaching the crown of your head toward the ceiling. Exhale and hinge from your hips (not your waist), reaching forward to grasp the sides of the wheel. Use the wheel as leverage to gently pull your chest toward your toes, keeping your spine as straight as possible.
The Breath: Hold for 5 to 8 breaths. With every inhale, find a little more length in your spine; with every exhale, see if you can fold a millimeter deeper.
The Benefit: Releasing hamstring tension takes immense pressure off the lumbar spine and pelvis, creating a more balanced posture.
Integrating the Practice and Staying Safe
In my experience, the key to lasting relief from back pain isn't found in a single, intense stretching session, but rather in consistent, gentle, and mindful practice. Integrating these yoga wheel stretches into your daily routine—perhaps for just 10 to 15 minutes each morning or evening—can yield compounding benefits over time.
However, holistic wellness always requires us to be intelligent about our bodies. Please keep the following safety tips in mind:
Listen to Your Body: A stretch should feel like a deep, satisfying release. It should never feel sharp, stabbing, or painful. If you feel pain, gently ease out of the pose immediately.
Protect Your Neck: When rolling backward over the wheel, ensure you are supporting your neck. If you lack the mobility to let your head drop back comfortably, keep your chin tucked or use your hands to support the base of your skull.
Breathe: It is common to unconsciously hold your breath when encountering physical tightness. Your breath is the signal to your nervous system that it is safe to relax. Keep your breathing steady and deep.
Consult a Professional: While naturopathic and yogic tools are incredibly powerful, they are most effective when used safely. Always remember to consult with a doctor or physical therapist before beginning any new exercise regimen, especially if you have a history of spinal injuries, herniated discs, or chronic conditions.
Final Thoughts
The journey to a healthy, pain-free back is an act of self-care. By utilizing a simple yet highly effective tool like a yoga wheel, you are taking proactive steps toward spinal health, improved posture, and a greater overall sense of well-being. Incorporate these stretches, stay consistent, and watch as your body responds with increased flexibility and vitality.
May your practice bring you peace, alignment, and long-lasting comfort.
Contact
rkyogablog@gmail.com